We are digital piano & keyboard specialists, based in Banbury, Oxfordshire. Stay up to date with the latest
news, reviews, tips, and offers by joining our FREE newsletter (unsubscribe at any time).
One of the standout features of the Yamaha CVP-909 is its ability to record audio files in .wav format rather than just MIDI.
Why is this important?
Recording in audio ensures your performance sounds exactly as it did on the CVP-909, no matter where or how you play it back.
Audio recordings can be played on computers, shared via email, uploaded online, or even enjoyed on other music devices—all without losing the rich, authentic sound you’ve created.
In this blog, we’ll show you how to record audio on your CVP-909 and transfer it to a USB stick for sharing.
And for those who prefer a visual walkthrough, the video below features Chris demonstrating the entire process step by step.
What’s the Difference Between Audio and MIDI?
Before diving into the tutorial, let’s quickly explain the difference:
MIDI: MIDI files are digital instructions for recreating a performance. They store information like which keys were pressed and at what velocity, but they don’t capture the actual sound of the piano. MIDI files require compatible software or instruments to sound as intended.
Audio: Audio files (.wav) capture the actual sound produced by the CVP-909, including voices, effects, and accompaniment. These files can be played back on any device that supports audio formats, making them more versatile for sharing and playback.
Now, let’s get started!
Step-by-Step: Recording Audio on the CVP-909
Prepare to Record:
Select the voice, style, and settings you want for your performance.
Ensure you’re happy with the sound, as this is exactly what will be captured in your audio file.
Switch to Audio Recording Mode:
Access the CVP-909’s recording menu on the touchscreen.
Select the option to record in Audio (.wav) format instead of MIDI.
Start Recording:
Press the record button and begin playing your performance. The CVP-909 will capture every nuance of your music in high-quality .wav format.
Save the Recording:
When you’re finished, stop the recording and it’ll save automatically to the CVP-909’s internal memory. The file will have a name which ends in .wav – this will appear on the home page on the right hand side.
Chris explains these steps in more detail in the video above, showing you exactly where to navigate on the CVP-909’s interface.
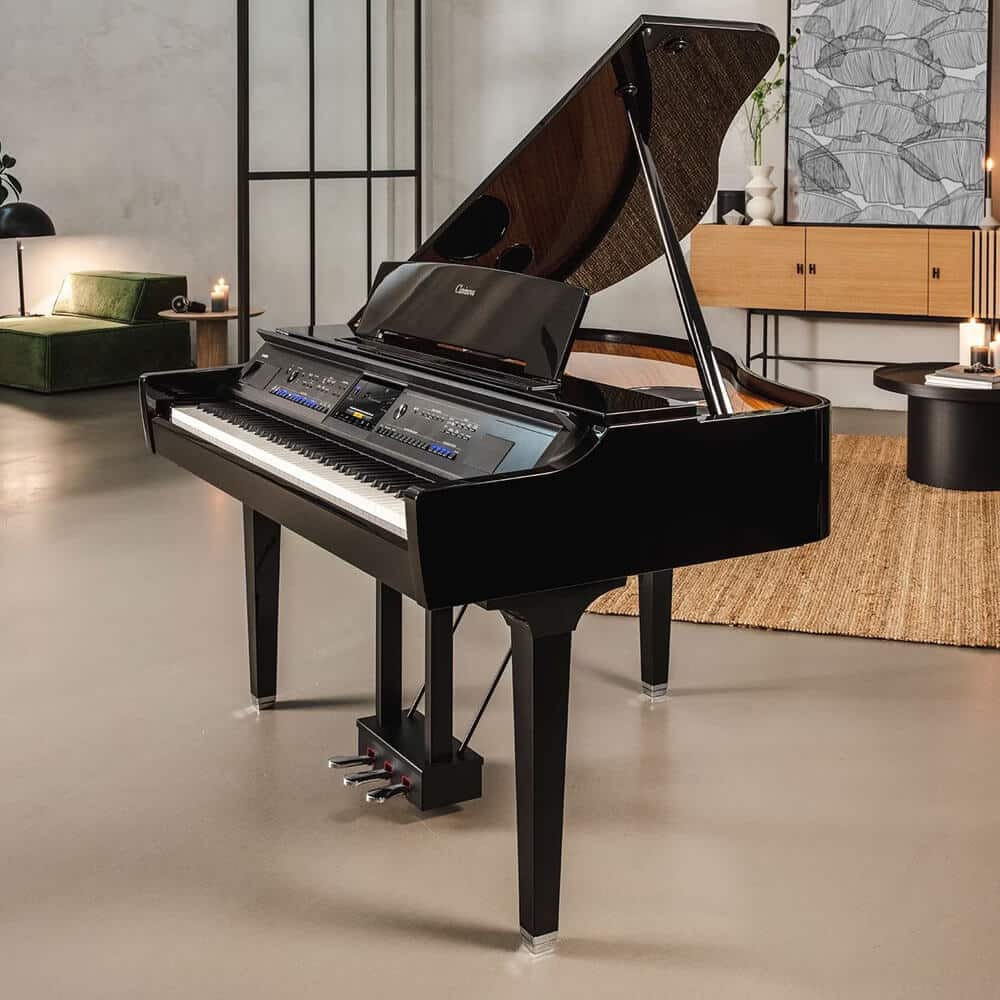
The Yamaha CVP-909GP Digital Piano
Transferring Audio to a USB Stick
Once your audio recording is saved, it’s time to transfer it to a USB memory stick for sharing.
Insert a USB Stick:
Plug a compatible USB stick into the CVP-909’s USB port.
Locate and Copy the File:
Navigate to your saved recordings on the touchscreen.
Select your audio file and copy it to the USB stick.
Eject and Share:
Safely eject the USB stick and plug it into your computer. From here, you can email the file, upload it to social media, or play it on other devices.
Chris shows this process step-by-step in the video, so don’t miss out if you’re unsure about any of the details!
Why Audio Recording on the CVP-909 Is a Game-Changer
Recording audio on the Yamaha CVP-909 allows you to:
Share Effortlessly: Send your recordings via email or upload them online to platforms like YouTube or SoundCloud.
Play Anywhere: Enjoy your music on other computers, mobile devices, or speakers without needing specialised software.
Preserve Authentic Sound: Capture the full richness and realism of the CVP-909’s voices, styles, and effects.
Bringing the Showroom to You
At ePianos, we love helping you get the most out of your digital piano.
Our detailed product videos, like the one featured in this blog, bring the showroom experience right to your home.
So, grab a USB stick, watch the video, and let Chris guide you through recording and sharing your audio on the Yamaha CVP-909.
It’s easier than you think, and the results are incredible! 🎹✨
Sign up to our Newsletter
Enter your email address below to receive our free weekly newsletter containing the latest piano,
keyboard and organ demonstration videos, breaking news, special offers, invitations to our live video
events, technical support articles and much more.
Chris Hammond
Manager at ePianos
Chris handles all of our ePianos marketing, and is responsible for the creation and production of the majority of our product videos.
Chris is also one of our top blog writers, having extensive knowledge of keyboard instruments, years of experience in musical instrument retail, and a background in live performance and composition.
For more detailed information regarding delivery and returns, including our 14-day returns policy,
please click here.
Please note: UK mainland DOES NOT include the Channel Islands, or the Scottish
Highlands. Surcharges may apply, so please contact us for more information before purchase.
Additionally, our in-house team, courier delivery, and postal services neither deliver nor collect on Bank
Holidays, so there will be a delay during these periods.
Special Order items
These items are sold on behalf of Yamaha, and are sent to us on a per-order basis, typically within 5-7 working days, unless an ETA is otherwise stated.
We'll contact you the moment your purchase arrives with us to organise delivery, based on your selected option.
Brand new products over 30kg
Example products: Yamaha DGX670, Yamaha P-525, Yamaha YDP-S55, Yamaha Clavinova.
These items must be sent with a heavy-goods courier (typically APC or FedEx). On occasion, depending on which is fastest, we will drop-ship directly from Yamaha to your address via Dachser.
Tracking will be provided by the haulier, with a typical arrival time of 1-2 working days.
*If you have included the optional £180 "Yamaha Premium Service" home delivery & setup option offered on selected products, we will contact you regarding arrangements after purchase.
**The Yamaha CSP Series, Yamaha CVP905 & CVP909, Yamaha CLP875, 885 & 895GP, and Yamaha NU1Xa are all sold on behalf of Yamaha and arrive with us on a per-order basis. As soon as your piano has arrived, we will contact you to organise the appropriate dispatch method. ETA for stock is shown on the product page for those items.
***If you have included the optional £99 home delivery & setup option offered on selected products, we will send your details direct to the installation team, who will contact you within 48 hours to make arrangements.
Used or display products over 30kg
Depending on which option is most appropriate, we will either contact you to discuss a bespoke ePianos delivery surcharge for goods we can’t package for a 3rd party courier, or otherwise dispatch goods via FedEx or APC.
If a courier is used, tracking will be provided by them directly, with a typical arrival time of 1-2 working days.
All products under 30kg
Example products: Yamaha PSR-SX920, Yamaha P-225, Yamaha NP-15.
These items will be sent via courier (typically APC or FedEx). On occasion, depending on which is fastest, we will drop-ship directly from Yamaha to your address via UPS or Parcelforce.
Tracking will be provided by the courier, with a typical arrival time of 1-2 working days.
Smaller items, such as books, discs, etc, will be dispatched via Royal Mail second class.
Downloadable Content
After purchase, you can download the file either from the order confirmation page or the "Downloads" tab in "My Account".
If you have selected the option to receive a pre-loaded USB stick, then this will be dispatched via Royal Mail.
Pre-orders
We will contact you regarding any pre-ordered items, and let you know when they arrive so as to arrange delivery with you at a convenient time.
We offer interest-free and interest-bearing finance options on selected products.
Finance options for new products
2–5 years interest-bearing finance at 19.9% APR (minimum 10% deposit).
A minimum loan amount of £500 after deposit is required.
Finance options for used products
Used items can also be purchased using either of the following options
(minimum loan amount of £250 after deposit):
10 months at 0% APR (minimum 50% deposit)
6 months at 0% APR (minimum 10% deposit)
Representative Example
Cash price: £700
Deposit: £70
Loan amount: £630
APR representative: 19.9%
Interest rate: 19.9% p.a. fixed
36 monthly repayments of: £22.87
Total loan term: 36 months
Total amount payable: £893.32
Available finance options are displayed at checkout. Alternatively,
please get in touch
and we’ll be happy to discuss the options, or email a finance application to you. Find out more by clicking here
Seasonal Hours
Our seasonal opening hours are as follows:
Christmas Eve: 10am to 1.30pm
Christmas Day: Closed
Boxing Day: Closed
New Year's Eve: 10am to 1.30pm
New Year's Day: Closed
Bank Holidays
We are closed on all bank holidays, therefore the processing of sales and deliveries will be delayed.
Tyros Tipsters Bonus Content for Tyros 5
Here's what we offer when you select the option to include our Bonus Content...
We update the firmware so that your Yamaha Tyros 5 is running on the latest version
We load in 600 registrations into the Tyros 5 which give you sound set-ups in your
registration bank buttons for different genres of music
We add 1825 songs into the Tyros 5 Music Finder
Contact Us
We are pleased to be able to offer interest-free finance on selected products through Novuna Personal Finance, for a limited period only.
This offer is available on purchases of:
Brand New Yamaha Genos 2
Brand New & Used Yamaha SX920 (if purchased with bonus content & guide)
Used Yamaha SX900 (if purchased with bonus content & guide)
Used Yamaha Genos 1 (if purchased with bonus content & guide)
Get in touch to request a remote 0% finance application with or without a part-exchange using the form below:
Here's what we offer when you select the option to include our Bonus Content...
Latest Firmware
27 Expansion packs which include 557 voices and 381 backing styles
234 extra styles from Tyros 5
600 registrations
2673 song setups
Video showing where all the key features are
...and when you select the option to include our GenosTipsters Guide
We include our GenosTipsters guide (digital version) worth £99,
featuring over 3 hours of video and 200 pages of written accompaniment.
Disclaimer – a proportion of this content is made available freely by Yamaha,
for those fully competent and confident with using the required software to install it via computer.
Information about this item
For orders of any stock displaying a 7-10 day lead time, we will contact you as soon as the item arrives with us to schedule a delivery with you.
Occasionally, there may be availability issues with our suppliers, in which case we'll get in touch with you to see if you're happy to wait, or if you'd like to cancel the order and receive a full refund.
Information about this item
This is a special order "agency" item, and comes to us directly from Yamaha on a per-order basis.
It typically takes 7-10 days for this item to arrive with us, whereupon we'll contact you to discuss the arrangement of delivery.
Information about this item
For any pre-orders, we will contact you as soon as the item arrives with us to schedule a delivery with you, and update you with an ETA.
Occasionally, there may be availability issues with our suppliers, in which case we'll get in touch with you to see if you're happy to wait, or if you'd like to cancel the order and receive a full refund.
Get up to £250 cashback from Yamaha*
Yamaha is offering customers cashback on selected purchases until January 15th 2026 - here's how it works:
Purchase a qualifying Yamaha instrument before 15.01.26.
Complete the claim form
following this link
and have your proof of purchase and serial number ready.
Once your claim has been validated, you will be sent within 35 working days your cashback reward via bank transfer.
*Cashback amount varies product to product, as indicated.
Available Content for Genos 1
Here's what we include when you select the option to add our Bonus Content...
Latest Firmware
23 extra expansion packs which include 877 voices and 577 backing styles
234 extra styles from Tyros 5
600 registrations
4096 song setups
Video showing where all the key features are
...and when you select the option to include our GenosTipsters Guide
We include our GenosTipsters guide (digital version) worth £99,
featuring over 3 hours of video and 200 pages of written accompaniment.
Disclaimer – a proportion of this content is made available freely by Yamaha,
for those fully competent and confident with using the required software to install it via computer.
Part Exchange
Genos Tipsters Bonus Content for SX900
Here's what we offer when you select the option to include our Bonus Content...
Latest Firmware
14 Expansion Packs inc many extra voices and styles
234 T5 styles
600 registrations
T5 Music Finder
15 Playlists with 2287 song set-ups
Video showing where all the key features are
...and when you select the option to include our GenosTipsters Guide
We include our GenosTipsters guide (digital version) worth £99,
featuring over 3 hours of video and 200 pages of written accompaniment.
Disclaimer – a proportion of this content is made available freely by Yamaha,
for those fully competent and confident with using the required software to install it via computer.
Available Bonus Content for SX920
Here's what we offer when you select the option to include our Bonus Content...
Latest Firmware
25 Expansion packs which include 780 voices and 540 backing styles
234 extra styles from Tyros 5
600 registrations
4256 song setups including 136 ‘Decades’ registrations
Video showing where all the key features are
...and when you select the option to include our GenosTipsters Guide
We include our GenosTipsters guide (digital version) worth £99,
featuring over 3 hours of video and 200 pages of written accompaniment.
Disclaimer – a proportion of this content is made available freely by Yamaha,
for those fully competent and confident with using the required software to install it via computer.
Bonus Content for Korg Pa5X
Here's what we include when you select the option to add our Bonus Content...
Korg Bonus Styles (Taken from the Bonusware downloads on Korg UK website) – 450 styles
Korg Pa2x Internal Styles converted to 5x – 419 styles, all complete with 4 x Keyboard Sets
Korg Pa3x Internal Styles converted to 5x – 486 styles, all complete with 4 x Keyboard Sets
Korg Pa4x Internal Styles converted to 5x – 584 styles, all complete with 4 x Keyboard Sets
Korg Pa800 Internal Styles converted to 5x – 409 styles, all complete with 4 x Keyboard Sets
Korg Musikant 4x Internal Styles converted to 5x – 577 styles, all complete with 4 x Keyboard Sets
ePianos Songbook for Pa5x – A collection of over 200 well-known songs with 4 Keyboard Sets per song, giving in
excess of 800 registrations
Latest Osimo Songbook from Korg
3 x User Sound Packs from Korg
6 x Korg Pa5x User Know How videos covering: "Power Up & Panel", "Selecting Styles", "Selecting Sounds", "My
Setting & Favourites", "Mixer Basics", "Songbook", and "Recording"
How to Locate and Load the Various Software Bundle Components (Video)
Available Bonus Content for Genos 2
Here's what we offer when you select the option to include our Bonus Content:
Latest Firmware
52 expansion packs which include 1,721 voices and 1,148 backing styles
234 extra styles from Tyros 5
816 registrations
4256 song setups including 160 ‘Decades’ registrations
Video showing where all the key features are
Some of the best parts of our Bonus Content option are the 1,721 new extra voices and 1,148 new extra styles
included
across 52 expansion packs. These packs are quite complex to upload and, whilst free to obtain, we pride ourselves on
getting them into your keyboard for you — something many dealers shy away from purely because of the time it takes
to get them uploaded.
...and when you select the option to include our GenosTipsters Guide:
We include our GenosTipsters guide (digital version) worth £99,
featuring over 3 hours of video and 200 pages of written accompaniment.
Disclaimer – a proportion of this content is made available freely by Yamaha,
for those fully competent and confident with using the required software to install it via computer.














Comments: